Category: Development

.NETDevelopmentVisual Studio

Centralizing NuGet Package Versions with Central Package Management

In my Running and Building Azure Functions with Modern .NET talk this week at the Mississauga .NET User Group, one of the topics that consistently gets a reaction from the audience is Central Package Management (CPM). Once I show people what it does, the reaction is almost always the same: “I didn’t know this existed — I need to go add this to all my solutions.”

This post is the written companion to that section of the talk. If you’ve ever dealt with the pain of keeping NuGet package versions in sync across a large solution, CPM is going to be immediately relevant to you.

What is Central Package Management?

Central Package Management is a built-in .NET feature that lets you define all NuGet package versions in a single place — a Directory.Packages.props file at the solution root — rather than scattering Version attributes across individual .csproj files.

Here’s a simple example of what that file looks like:

<Project>
<PropertyGroup>
<ManagePackageVersionsCentrally>true</ManagePackageVersionsCentrally>
</PropertyGroup>
<ItemGroup>
<PackageVersion Include="Microsoft.Azure.Functions.Worker" Version="2.0.0" />
<PackageVersion Include="Microsoft.Azure.Functions.Worker.Extensions.Http" Version="3.3.0" />
<PackageVersion Include="Newtonsoft.Json" Version="13.0.3" />
</ItemGroup>
</Project>

And in your individual .csproj files, you simply reference the package without a version:

<ItemGroup>
<PackageReference Include="Microsoft.Azure.Functions.Worker" />
<PackageReference Include="Newtonsoft.Json" />
</ItemGroup>

The version is automatically resolved from the central file. Clean, simple, and immediately obvious what version you’re on when you look at the central file.

Why This Matters

In a solution with many projects, keeping package versions in sync manually is error-prone. You end up with Project A on Newtonsoft.Json 13.0.1 and Project B on 13.0.3 without anyone really noticing until a subtle runtime difference bites you. CPM solves this by making version drift impossible — there’s one place to look and one place to change.

Benefits at a glance:

  • Single source of truth for all package versions in the solution
  • Eliminates version drift across projects
  • Cleaner .csproj files — no version attributes cluttering your package references
  • Supports both direct and transitive dependency version control

Manually Migrate an Existing Solution to CPM

If you already have a solution with a bunch of projects, migrating to CPM is straightforward but can be tedious to do by hand across many .csproj files. Here’s the approach:

Step 1: Create Directory.Packages.props

At the root of your solution, create a Directory.Packages.props file with ManagePackageVersionsCentrally set to true and consolidate all your package versions as <PackageVersion> entries:

<Project>
<PropertyGroup>
<ManagePackageVersionsCentrally>true</ManagePackageVersionsCentrally>
</PropertyGroup>
<ItemGroup>
<PackageVersion Include="PackageName" Version="x.y.z" />
<!-- add all packages here -->
</ItemGroup>
</Project>

Step 2: Remove Versions from Project Files

Strip the Version attribute from every <PackageReference> in your .csproj files. If you have many projects, do this with the CentralisedPackageConverter CLI tool (covered below) — don’t do it by hand.

Step 3: Validate and Build

Build your solution and confirm everything resolves correctly. Pay attention to any packages that may have conflicting versions across projects — those will need a conscious decision about which version to standardize on.

This is great, but there must be a better way. Let’s take a look at a community tool that automates this process.

Using the CentralisedPackageConverter CLI Tool

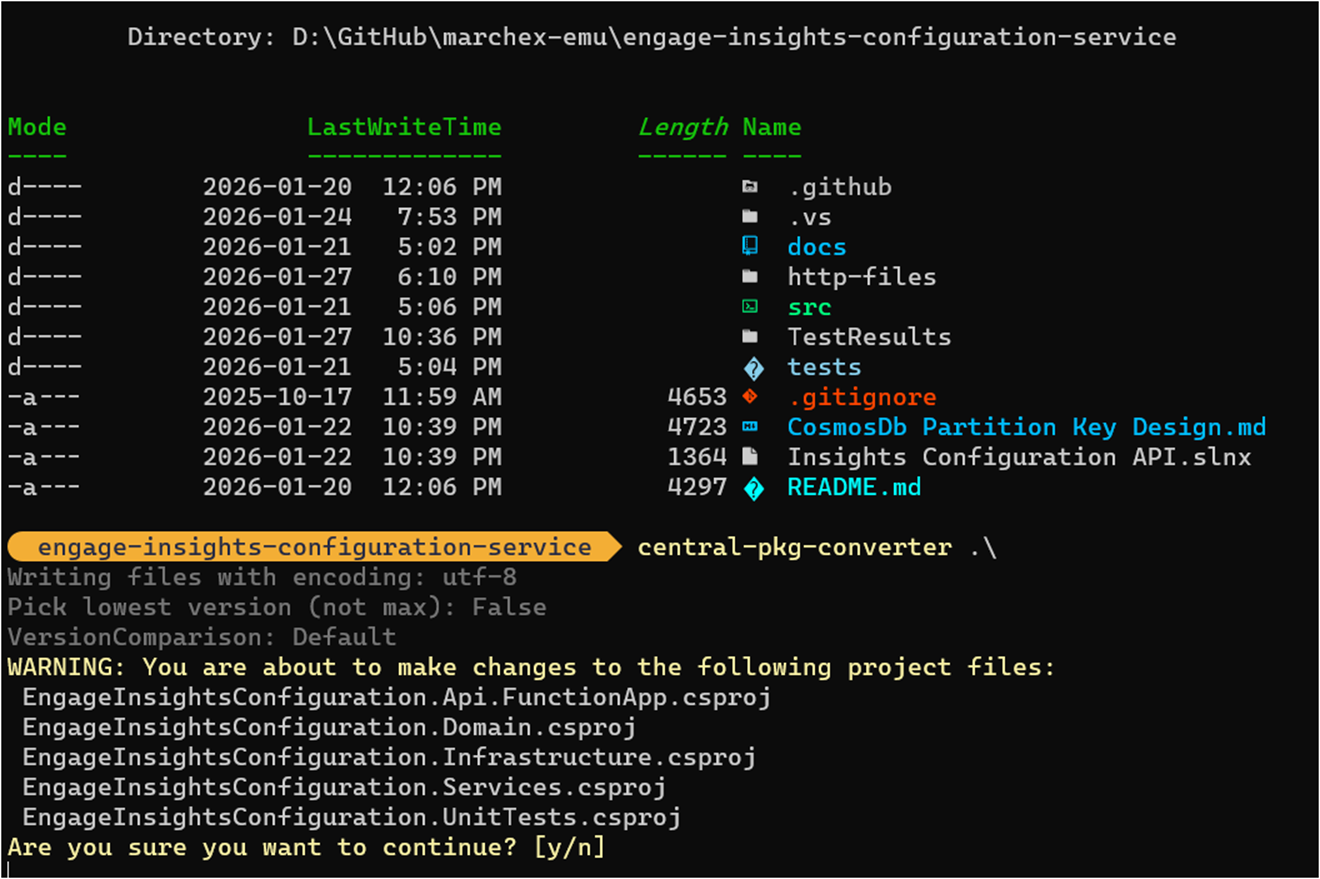
The best way to handle the migration for an existing solution is the CentralisedPackageConverter CLI tool, which automates the tedious parts:

# Install the tool globally
dotnet tool install CentralisedPackageConverter --global
# Run the conversion against your solution folder
central-pkg-converter /path/to/your/solution/folder

The tool will:

  • Scan all .csproj files in the solution
  • Generate a Directory.Packages.props with all discovered versions
  • Remove version attributes from individual project files

I highly recommend using this over a manual migration. It’s fast and reduces the chance of missing something.
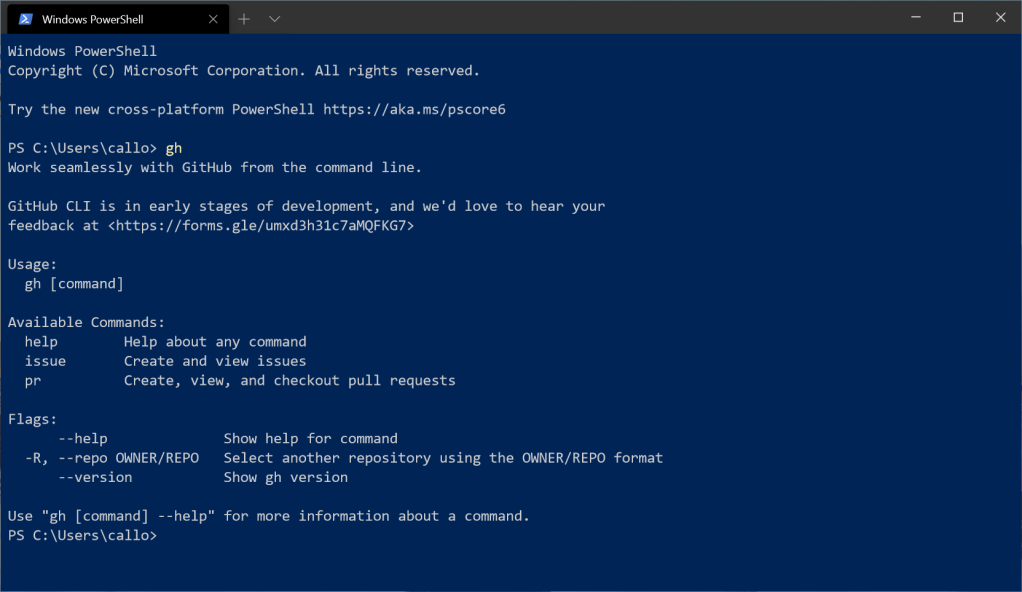
Let’s try this out.

We now have a Directory.Packages.props with all discovered versions:

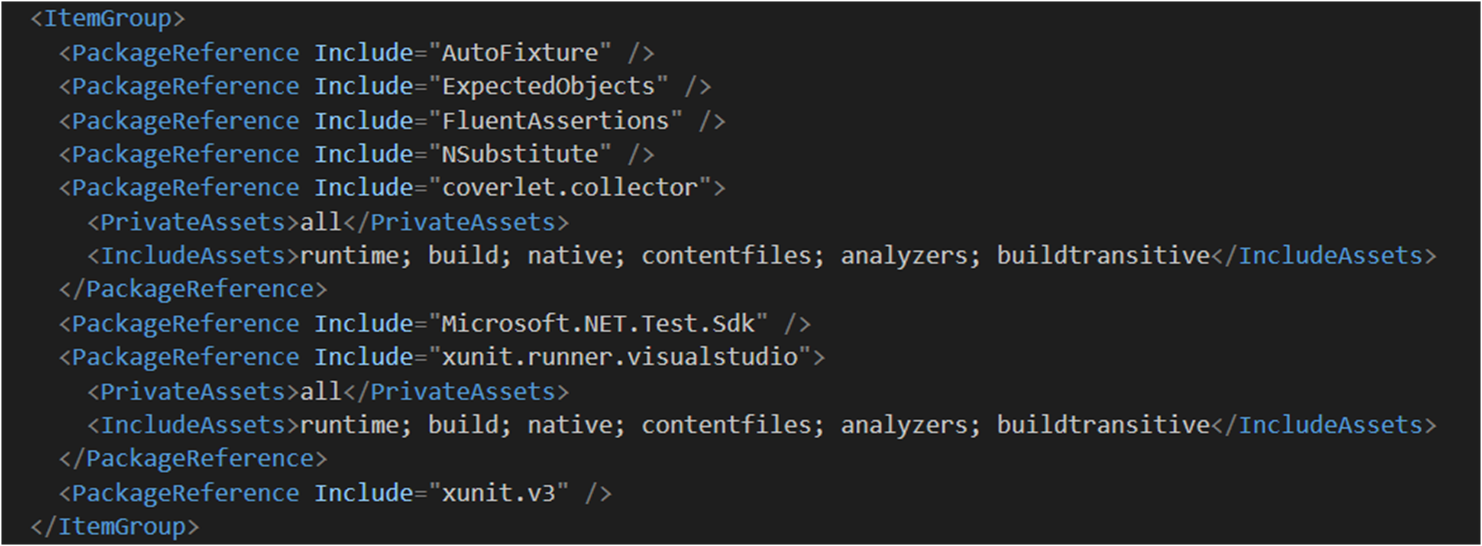
And if we look in our project files, the versions are removed:

Advanced Features


Once you’re on CPM, there are a few additional capabilities worth knowing about.

Overriding Versions per Project

There are situations where a specific project needs a different version of a package than the rest of the solution — say, a legacy integration that can’t move to the latest version yet. CPM handles this with VersionOverride in the individual project file:

<PackageReference Include="SomePackage" VersionOverride="1.2.3" />

Use this sparingly. Its presence in a project file is a signal that something needs attention.

Different Versions per Target Framework

If you have a multi-targeted project, you can conditionally apply different versions by target framework using standard MSBuild conditions within Directory.Packages.props:

<PackageVersion Include="SomePackage" Version="2.0.0" Condition="'$(TargetFramework)' == 'net10.0'" />
<PackageVersion Include="SomePackage" Version="1.5.0" Condition="'$(TargetFramework)' == 'net8.0'" />

Transitive Pinning

This one quietly solves a very real problem. Version drift caused by transitive dependencies — packages your packages depend on — is easy to miss and can cause subtle compatibility issues. CPM supports pinning transitive dependencies centrally, so you stay in control of the full dependency graph, not just the packages you reference directly.

Summary

Central Package Management is one of those features that makes you wonder how you managed without it once you adopt it. If you’re running a multi-project .NET solution, this is a straightforward improvement with immediate payoff — consistent package versions, cleaner project files, and a single place to make dependency updates.

Enjoy!

References

.NETDevelopmentVisual Studio

The New .slnx Solution File Format — A Better Way to Manage Visual Studio Solutions

In my Running and Building Azure Functions with Modern .NET talk this week at the Mississauga .NET User Group, I closed out the .NET tooling section with a quick look at the new .slnx solution file format. It’s one of those changes that doesn’t get a lot of attention but makes day-to-day .NET development noticeably more pleasant — especially if you’ve ever dealt with a gnarly merge conflict in a .sln file.

This post walks through what .slnx is, why it’s better than the traditional .sln format, and how to migrate.

What’s Wrong with .sln?

If you’ve worked with Visual Studio solutions for any length of time, you’ve almost certainly encountered the pain points with .sln files. They’ve been around since the early 2000s and they work — but they come with a set of frustrations that have never really been addressed:

  • They’re nearly unreadable — the format uses GUIDs and magic identifiers that aren’t intuitive at all
  • Merging is painful — a .sln file being touched by two developers at the same time is a merge conflict waiting to happen
  • Tooling struggles with them — custom scripts or CI tooling that needs to parse a .sln file often resorts to fragile string manipulation

Here’s a snippet of a traditional .sln to illustrate:

Project("{FAE04EC0-301F-11D3-BF4B-00C04F79EFBC}") = "MyFunctions", "src\MyFunctions\MyFunctions.csproj", "{A1B2C3D4-E5F6-1234-ABCD-EF0123456789}"
EndProject
Global
GlobalSection(SolutionConfigurationPlatforms) = preSolution
Debug|Any CPU = Debug|Any CPU
Release|Any CPU = Release|Any CPU
EndGlobalSection
EndGlobal

Not exactly something you want to review in a pull request.

Introducing .slnx

The .slnx format is a new, XML-based solution file format introduced in the .NET 9.0.200 SDK. It addresses all of the above problems:

<Solution>
<Project Path="src/MyFunctions/MyFunctions.csproj" />
<Project Path="src/MyFunctions.Tests/MyFunctions.Tests.csproj" />
</Solution>

That’s it. No GUIDs. No magic identifiers. No indecipherable global sections. Just a clean XML file that clearly describes what’s in the solution.

Why It’s Better

Better readability — the XML structure is immediately understandable. Any developer can open a .slnx file and know exactly what’s in the solution without reverse-engineering the format.

Simplified merging — because it’s XML with simple, meaningful elements rather than a blob of GUIDs and platform strings, merge conflicts in .slnx files are much easier to resolve. In most cases, merging two developers’ changes to the solution file becomes a trivial diff.

Easier parsing — if you write build scripts, CI automation, or any tooling that needs to know what projects are in a solution, parsing a .slnx file is now just standard XML parsing. Reliable and straightforward.

Converting from .sln to .slnx

The .NET CLI makes the migration trivially easy. From your solution folder, run:

dotnet sln migrate

From Visual Studio 2022

Go to File and save your solution file as…and select the XML Solution File format.

Before You Migrate

A few things to check before running the migration:

Commit your existing .sln file to source control before converting — gives you a clean rollback point if anything looks off.

Make sure your entire team is on a compatible toolchain — .NET SDK 9.0.200 or later, and a recent version of Visual Studio 2022 or Visual Studio 2026. Anyone still on an older setup won’t be able to open the solution until they update.

If you have CI/CD pipelines that parse or manipulate the .sln file directly (not uncommon in larger teams), update those to handle .slnx before you switch over.

Should You Migrate?

My honest take is yes, especially for new solutions. For existing solutions, there’s no urgency — your .sln files aren’t going anywhere — but if you’re already bumping into merge conflict pain or your solution file is getting unwieldy, the migration is trivially easy, and the payoff is immediate.

For new projects, I’d start with .slnx from day one. In fact if you’ve migrated over to Visual Studio 2026 it’s now the default options. It’s the better format, it’s supported by all current tooling, and you’ll thank yourself later.

Summary

The .slnx solution file format is a small change with a noticeably positive impact on day-to-day .NET development. XML-based, human-readable, merge-friendly, and trivially easy to adopt — there’s very little reason not to switch. Combined with Central Package Management and the new Azure Functions FunctionsApplication builder, these three improvements together represent a meaningfully cleaner modern .NET development experience.

Enjoy!

References

DeveloperDevelopmentGitHub

GitHub is now free for teams

GitHub announced that their making private repositories with unlimited collaborators available to all GitHub accounts. This means all of the core GitHub functionality is free for everyone.

For details about what features are included and compare plans, checkout the pricing page at https://github.com/pricing

Enjoy!

Resources

https://github.blog/2020-04-14-github-is-now-free-for-teams/

DevelopmentMobileProductivity

GitHub Mobile App Released

GitHub keeps on innovating in the source control management and collaboration space. There have been great new features like GitHub Actions recently,…

GitHub Mobile App Released
DeveloperDevelopment

New GitHub CLI announced and available as beta

This week GitHub announced the beta for their new GitHub CLI tool, which provides an easier and more seamless way for you to interact with GitHub from your terminal.

The GitHub CLI can be installed on Windows, macOS and Linux. Get started by downloading the installer from the GitHub CLI repository.

New GitHub CLI announced and available as beta

What can GitHub CLI do?

Once you have it downloaded, open up your terminal and use the gh command:

The GitHub CLI beta currently allows you to do the following commands:

  • Pull requests: Using the pr command to checkout, create, list, status and view
  • Issues: Using the issue command to create, list, status and view
  • Help: Using help command to see how to use the tool

When you first use it you will need to authenticate the GitHub CLI. As you can see here I will be prompted to open GitHub in my browser:

After authenticating the GitHub CLI you will be able to continue with your last command:

I needed to change directories to where my repository was and then I was able to list out my pull requests using the following command:

gh pr list

For more details about what can be done, check out the GitHub CLI manual for lots of examples on using each of the commands.

Wrap up

This is an early look at what can be done with the GitHub CLI, and because it’s still in early development the team would love for you to give the tool a try and then provide them feedback.

Enjoy!

Resources

Announcement https://github.blog/2020-02-12-supercharge-your-command-line-experience-github-cli-is-now-in-beta/

Download from https://cli.github.com/

Documentation at https://cli.github.com/manual/

AzureDeveloperDevelopment

25 days of serverless

Azure Advocates’ 25 Days of Serverless

December 1st sparks the start of Microsoft’s 25 days of serverless challanges. Each day throughout the month of December a new challenge will be published from the Microsoft Cloud Advocates. Your goal is to solve it in the programming language of your choice and then submit your solution via GitHub.

If you don’t know anything about Azure or serverless then no problem. Each challenge will provide hints to get your started

The Premise

Oh no! An evil grinch has stolen all of the world’s servers! Travel around the world helping everyone replace their current solutions to common tasks with serverless technology in time for the holiday rush.

Each day’s puzzle will bring you to a new location somewhere in the world! You’ll be helping local folks in that location with some problem they have, showing how moving to serverless can help things get done! Each day’s puzzle will bring you to a new location somewhere in the world! You’ll be helping local folks in that location with some problem they have, showing how moving to serverless can help things get done!

Join the Microsoft @AzureAdvocates and puzzle solvers all over the world for #25DaysOfServerless adventures!

Enjoy!

References

https://25daysofserverless.com/

https://dev.to/azure/merry-and-bright-with-azure-advocates-25-days-of-serverless-1hi0

DevelopmentWindows

.NET Core 3 for Windows Desktop | .NET Blog

.NET Core 3 for Windows Desktop | .NET Blog
— Read on devblogs.microsoft.com/dotnet/net-core-3-for-windows-desktop/

Development

Introduction to Git Version Control Workflow – Build Azure

Keeping track of file versions has been a long time issue in the world of software. This remains true if you’re writing source code for an application, com
— Read on buildazure.com/2018/02/21/introduction-to-git-version-control-workflow/

AIAzureDevelopmentEvents

Registration is now open for Microsoft Build

Build2019

Registration is now open for Microsoft’s premier developer conference, Microsoft Build, which is taking place May 6-8 in Seattle, WA. At Microsoft Build, you’ll get access to the latest product updates, hear about Microsoft’s strategy and product roadmaps, and get hands-on, ask questions, and learn the best practices.

Some of the benefits for attending Build are:

• Learning from real-world experiences on building, modernizing, and migrating cloud applications

• Add value to your new and/or existing applications with AI

• Collaborative coding with your peers using the latest development tools

• Increasing productivity for your business with DevOps automation, tooling, and processes

• Creating and deploying cross platform applications

• Discovering innovations across Mixed Reality, IoT, and Machine Learning

• Learning new ways to easily customize, build, and extend applications with minimal code

If you’re interested in the content from last year, here is complete listing of the 2018 sessions.

New this year is the ability to bring your student-aged family member (14-21 years old) to the conference for free! For details about this wonderful opportunity, click here. Space is limited, so register today. While attending the event last year, one of the Microsoft Executives brought his two daughters and it was awesome to see them take interest and engage with the speakers and product groups. I’m glad they made this available this year for all eligible students.

I went to Microsoft Build last year for the first time and loved the experience to see and try the latest technologies, to connect with peers, and discover new innovative solutions to build. I’m not able to attend this year but I’m hoping to go again in the near future. If you can’t attend, then you always have the option to watch it on demand.

If you’re interested in going, then Register for Microsoft Build now!

Enjoy!

References

Microsoft Build

Microsoft Build FAQ