There are a lot of awesome resources available with Microsoft Azure…Virtual Machines, Databases, Storage, Application Insights, Functions, Websites, IoT, Messaging, and a whole lot more. You’ll no doubt find that it’s easy to get started with Azure but sooner or later you will want to have other users use and possibly manage the resources you’ve created.
So how do you go about inviting users to your Azure subscription and providing them the necessary access and rights? Let’s take a look.
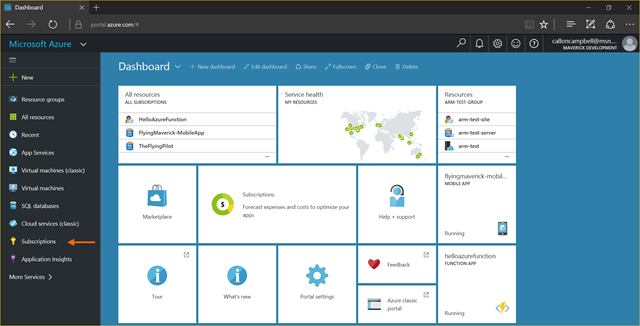
After logging in to your Azure portal, click on the Subscriptions navigation link on the left pane.
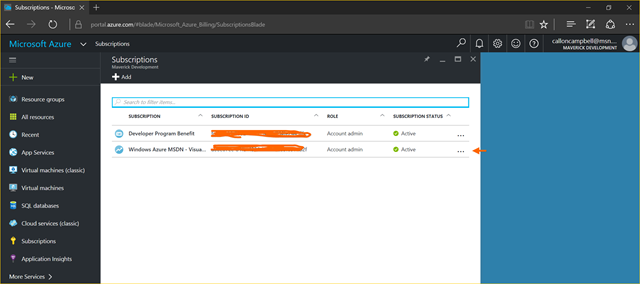
You will then see a list of Azure subscriptions. Select the subscription you wish to manage.
You will then see a blade open up to the right for the selected subscription. In your subscription blade will be an icon for users (top right corner of the Essentials pane). Click this button to manage users for this subscription.
Here you will see a listing of all users for this subscription. Click on the Add button to add a new user.
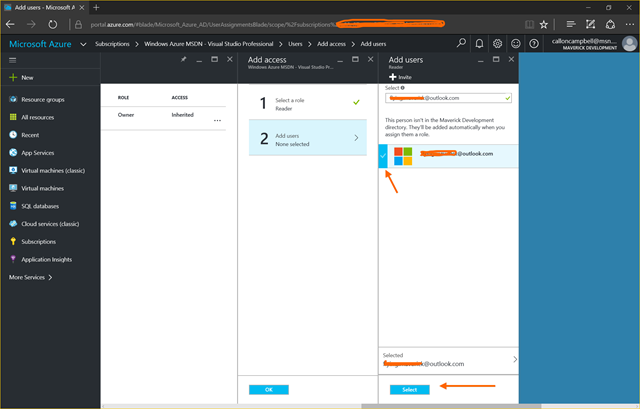
The add new user blade will now open up. First thing that is required is to select a role for this user. There are numerous roles available. In this case I just want this user to have the Reader role, which allows them to view data only:
After selecting the role for the user, click Select. Now you will need to invite a user. Type in the email address for their Microsoft Account. The user will then show up below. Make sure their email is selected with a checkmark. Then click on the Select button.
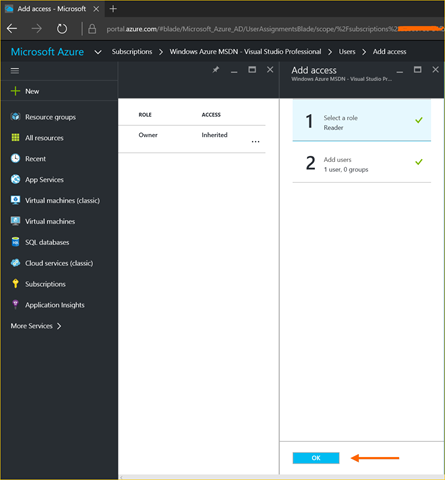
Now that you’ve assigned the role and added a user, click on OK to complete the action of adding a user.
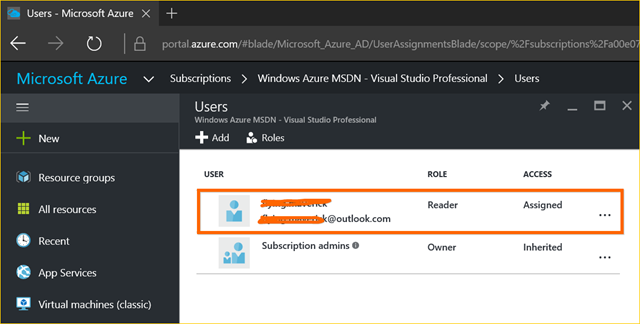
You will then see an Azure notification in the top right corner of your browser informing you that the user is being added. Within a few seconds the user should show up in your subscription users listing as shown below.
Once you’ve added the user you can now navigate to a specific Azure Resource and assign the user. Let’s do this now with an Azure Function I have.
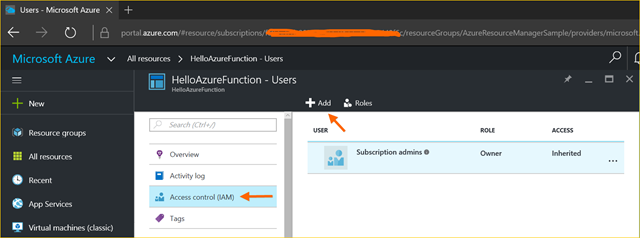
I’ve navigated to an existing Azure Function I have and I now want to add the user I just invited above. Click on the “Account control (IAM) link on the left and then click on the Add button on the right:
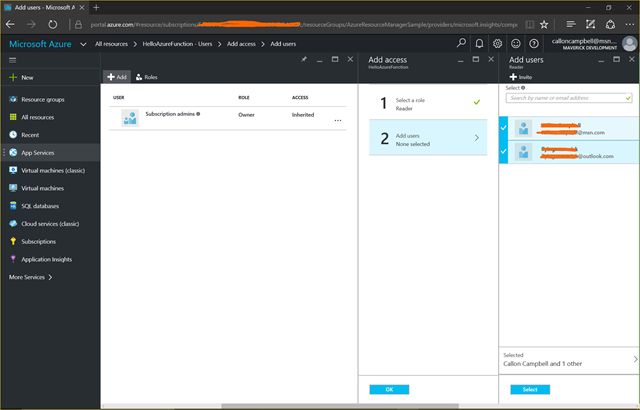
Next assign the role and click Select. The select the users(s) you want to add. You can select one or more users.In this example I’m going to select both users. Then click on the Select button, followed by the OK button.
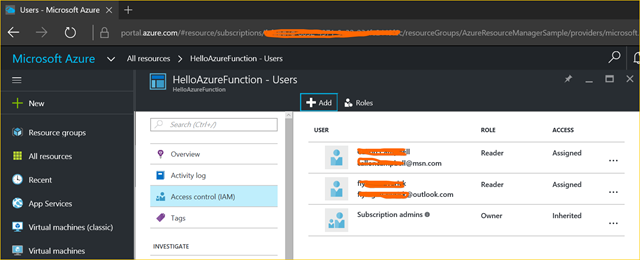
You will then see an Azure notification informing you the users are being added and once complete, you will see them listed as shown below:
That’s all there is to inviting users to your Azure subscription and then assigning them to specific Azure resources.
Enjoy!


Dude! 11 Screens to preform an invite 🙂 It GOTS to be easier man.